Welcome to the 453 QT Designer Tutorial
Hi this is a tutorial for setting up a basic OpenGL project with QT designer (Version 3.3.6) in a
Linux environment (namely Red Hat 9(?), and then Scientific Linux 5). This tutorial was
originally created for CPSC 453 at the University of Calgary in September of 2003 but has seen
lots of use since. My last update was January 2008. If you have problems or encounter mistakes
please email fredthechicken at yahoo.com. NOTE - The screenshots came from older QT version, if
you find the older screenshots disconcerting let me know and I'll redo them . . . eventually.
Part 1 - Creating a basic QT project and adding some widgets.
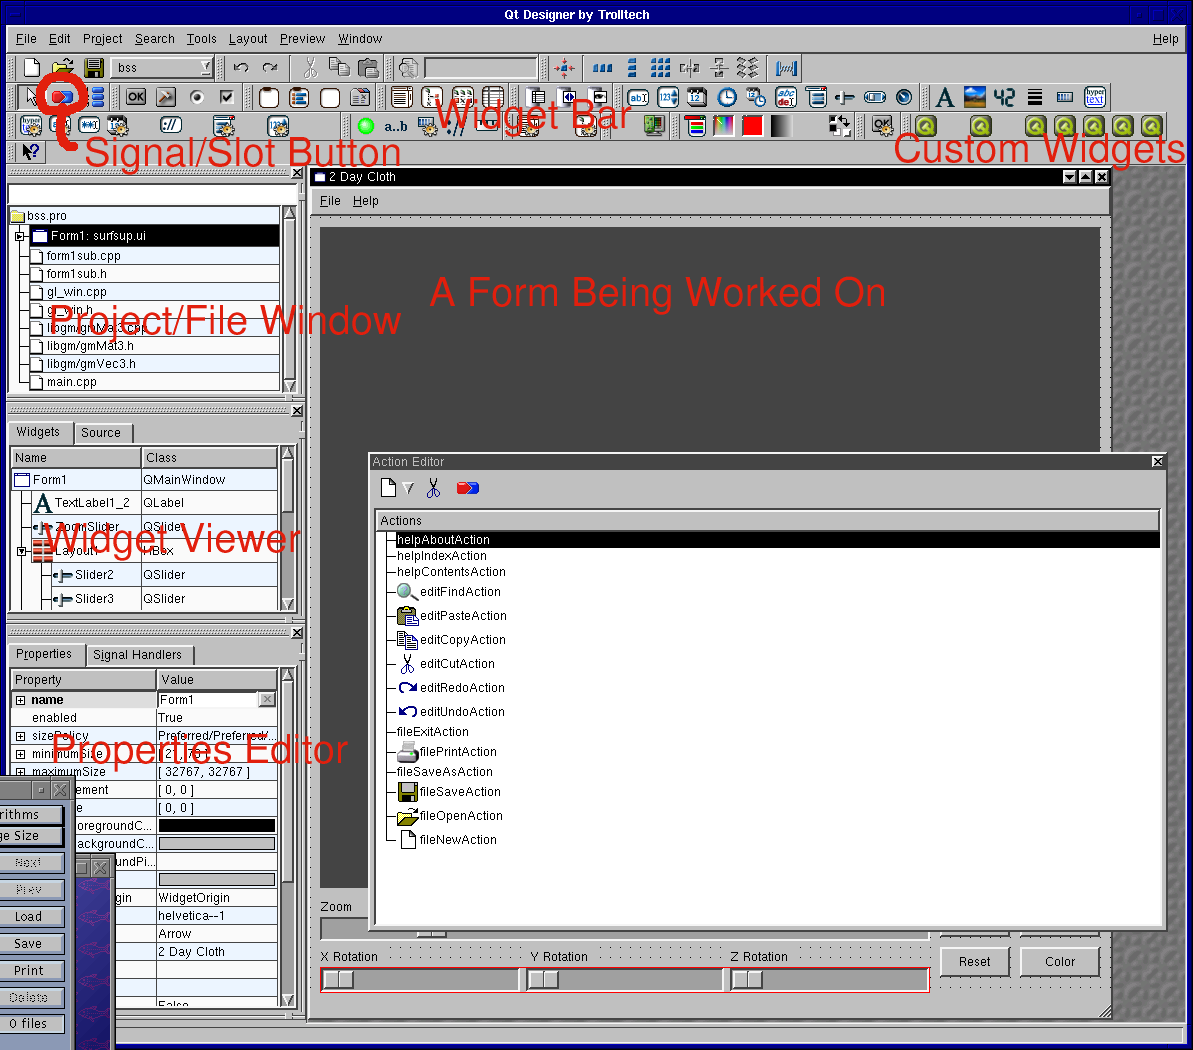
- This is a shot of QT Designer where a project is being worked on. Notice the areas
labelled in red.
- Run QT Designer by typing "designer &" at the shell.
- Go to Help -> About QT and note what version of QT you are using. If
this is not 3.3.6 you may have problems with this tutorial.
- Create a new QT project by going to File -> New -> C++ Project.
- Name the project file "easy.pro" and ensure it is saved in its own directory.
- Create your project's form by going to File -> New -> Dialog.
- This creates a form for you.
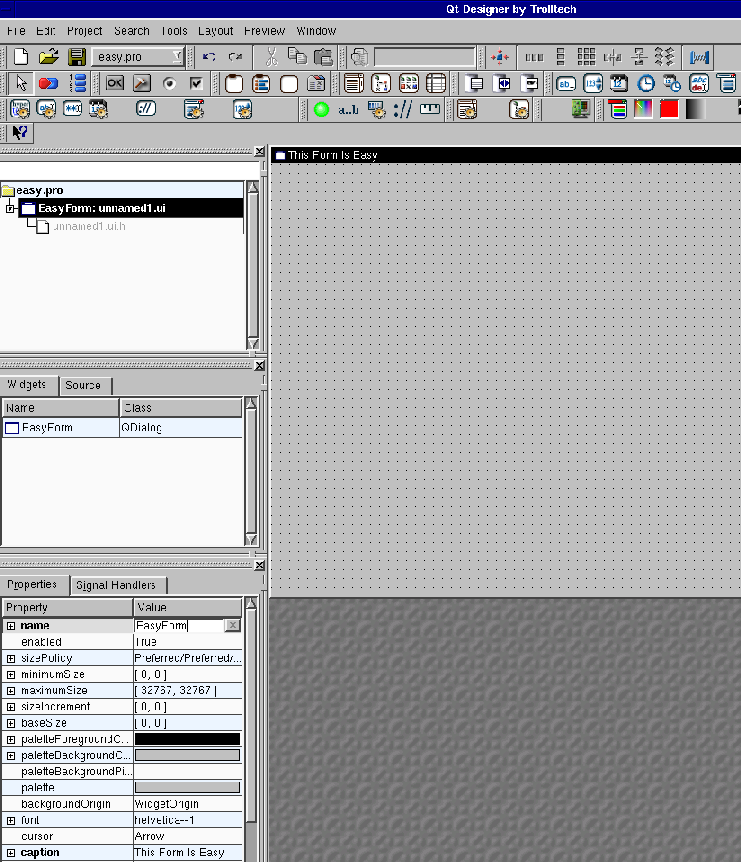
- Change the name of the form to EasyForm. This is an important step, because the
object representing the form will be called EasyForm. To change the name you click
on the form, so that the properties window contains the form's properties. Then
you scroll up or down along the properties window to find name. In the text box
next to this you replace "Form1" with "EasyForm".
- Change the caption of the form to whatever you want. Do this by looking for a changing
the caption property in the properties window.
- You should now have something like this.
- Add some widgets. This is done by dragging widgets from the tool box
(on left side by default) to where you'd like to place them on the form.
- Add three sliders from the input widgets list (for x, y, and z axis rotation).
- Add another slider (for scaling/zooming).
- Add four TextLabel widgets from the common widgets list. Place the TextLabels and
adjust their text property to describe the purpose of each slider.
- Add an LCD display (for showing the amount of scaling/zooming).
- Create a layout for the three rotation sliders. Do this by dragging a box
over the three sliders to highlight them, then right-click and select lay-out
horizontal or lay-out vertically depending on how you want to arrange the sliders.
- Rename the sliders appropriately (e.g., name the X rotation slider
xRotSlider).
- Event Handling. Connect the valueChanged(int) signal of the scale slider to the
display(int) slot of the LCD Number widget.
- Do this by clicking the arrow shaped signal/slot button.

- Then left click on the zoom slider, and dragging over to the LCD Number
before releasing the mouse button.
- This brings up the signal/slot dialog where you select the appropriate
signal (valueChanged(int)) and slot (display(int)).
You should end up with something like this:
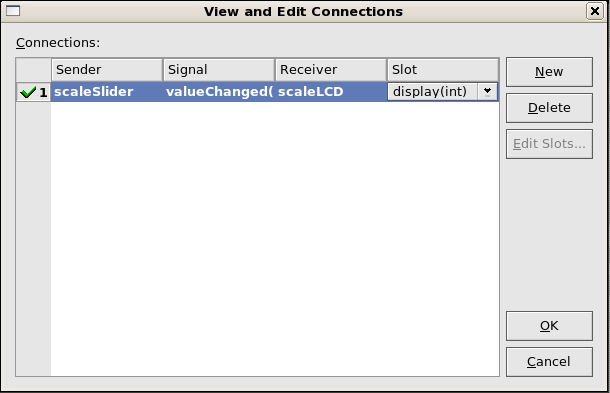
Then click the OK buttton.
- Save your work by going to File -> Save All.
- This will prompt you to Save Form 'EasyForm' As ... easyform.ui. Do this.
- Create your main.cpp file by going to File -> New -> C++ Main-File (main.cpp).
- After clicking the OK button on the resulting form the contents of the main.cpp file should appear.
Ensure that the #include in main.cpp has been created correctly. I.e., ensure the #include is
including easyform.h rather than unnamed.h or something similar.
- Save your work.
- In your shell, type "ls" and ensure that the files easy.pro, main.cpp and easyform.ui have been
created. If they haven't make certain you've saved your project and dialog to the
directory you're currently in. Then type qmake easy.pro. This creates a
makefile for you.
- Type make to compile your program.
- Type ./easy to run the program you've created.
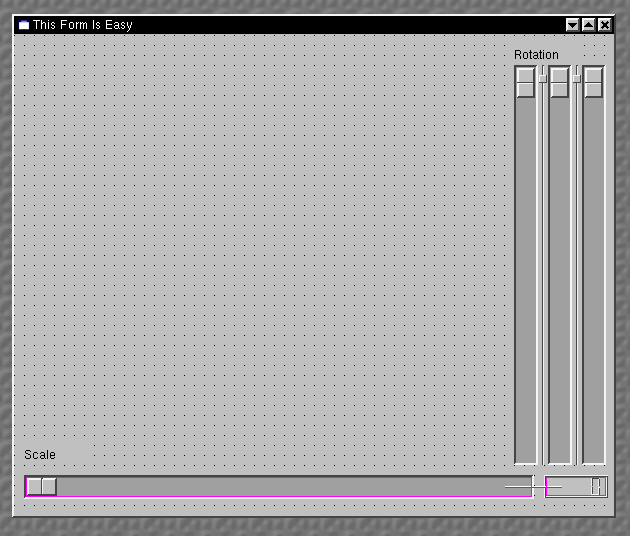
- You should now see something like this!
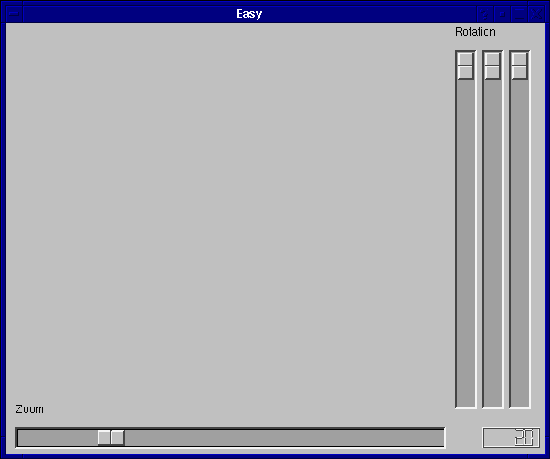
Check Point 1 - You should now have a running QT project with some sliders that don't
do much, except for the scaling slider that causes the LCD number to change. If not,
try again!
FYI
If you look around the directory you have created you will find the following files:
- Makefile - the file containing the compiling instructions for your program.
- easy - the executable you have created.
- easy.pro - your project file.
- easyform.ui - this file contains information about the EasyForm dialog you've created.
- main.cpp - the main file we created earlier.
However if you do a "ls -al" you will find three hidden directories have also been created. They are:
- .moc - this is where the moc files and stored for each of your forms. This are generated
by QT and you should never have to edit them.
- .obj - this contains all of the .o files generated by the compiler and are linked to
create your program.
- .ui - this directory contains .cpp and .h code for each of your forms. This files are
autogenerated by QT so don't bother changing them as your changes will be overwritten.
So basically you never have to touch anything in these hidden directories. This is why they are hidden.
Now continue on to Part 2!